Thursday, September 11, 2008

Ariocarpus fissuratus


Ariocarpus fissuratus is a species of extremely slow growing cacti aound in rare numbers in Mexico and the southern. Commonly called "living rocks," these cacti usually blend in well with the terrain around them. They are greyish-green in color, sometimes taking on a yellowish tint with age.

These cac

ti consist of many small tubercles growing from a large tap root. They are usually solitary, rarely giving rise to side shoots from old areoles. These cacti are difficult to spot in their natural

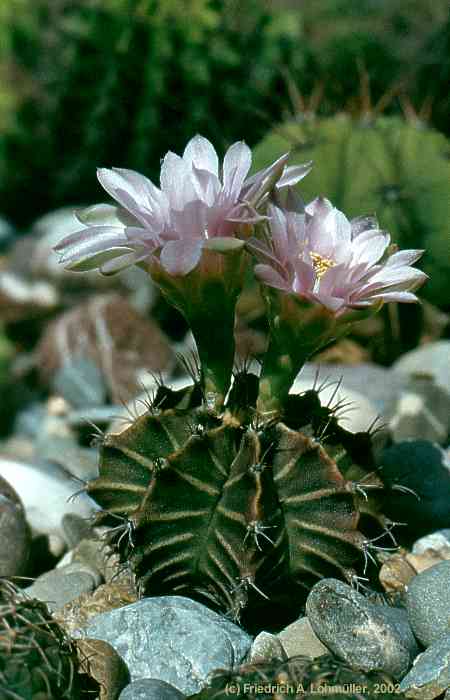
 habitat. When they are found, it is usually due to their pinkish flowers

In cultivation, Ariocarpus fissuratus is often grafted to a faster growing columnar cactus to speed growth, as they would generally take at least a decade to reach maturity on their own. They require very little water and fertilizer, a good amount of light, and a loose sandy soil with good drainage.

Growth Habits: Solitary, grows extremely slowly to 8 inches in diameter (20 cm)

Watering Needs: Little to no water in winter, little in summer, needs good drainage

Cultural Practices:
The Ariocarpus are rare slow growing cacti, a 6 inches in diameter mature specimen might be 20 years old. For 

many years the large mature specimens were collected in the wild, practice that has been severely limited by the new regulations, either in Mexico or in international trade. They are not adapted as house plants as they need a lot of sun and careful watering. The large taproot needs enough room to grow, which complicates the good 

drainage requirement, since the deeper the pot, the slower it drains.

The center growing part is sensitive to mealybugs attacks. Since this part is woolly, mealy bugs can be difficult to notice. The plant should be treated as 

soon as mealybugs are noticed.

Blooming Habits:

The Ariocarpus fissuratus has large, diurnal, 1.5 inches in diameter (4 cm), pale to deep pink satin flowers in mid summer, followed by fruit buried in the wool.

Source:Wikepedia, http://www.desert-tropicals.com

Sunday, July 13, 2008

The most common Rose Diseases


Rose is the queen of flowers. It is gorgeous and wonderful but is one of weakest plants, too. Rose is always damaged by diseases and pests. And if you have rose in your garden, here is the information you should know.


Common rose diseases vary by area, as the fungi which cause many of them are affected by temperature and moisture. Some of the most common rose diseases are Black Spot Disease, Powdery Mildew, Rust, and Rose Mosaic.


While rose diseases do not always kill rose plants, they often affect the leaves and make it more difficult for the rose to survive in the winter. Step-by-step sowing instructions:

Black Spot Disease

This disease, as its name implies, appears as black spots on the upper surfaces of the rose’s leaves. It is caused by a fungus, which is allowed to propagate in moisture, which can come from rain or watering over the leaves instead of down at the soil. It can also be caught from other diseased plants, as the fungus can spread through fallen leaves, or even through composting of diseased leaves and stems. It causes most diseased leaves to drop off early, but survives through the winter on any leaves that manage to stay on the rose. It can also survive through the winter on the stem.


Rust

This disease is not harmful at low levels, merely causing small orange growths on the underside of leaves. At higher levels, leaves begin to be damaged, which can damage the plant since the leaves are the part of the plant that produces energy.

Powdery Mildew

This disease is different from other common rose diseases, as Powdery Mildew does not need water. This growth, which resembles a white powder, occurs on the top and bottoms of leaves and on stems. In the summer, if roses are free of any fungi caused disease, Powdery Mildew can simply be hosed off of affected roses and thus, can be easy to take care of.

Rose Mosaic

This viral disease does not kill plants. Many rose gardeners do not need to deal with this disease, as all it does it cause splotches, often yellow and green, to appear on leaves.
There are many other rose diseases, and which ones are the most common in each area changes depending on the weather in that area. Ask for free gardening advice from neighbors, friends, and fellow rose growers, or pick up one of the many books available on growing roses.

To avoid getting rose disease, start by buying disease free plants from the garden supply store. There are also many disease resistant variants of roses, which while still susceptible to disease, are at least less likely to become diseased.

Once a plant is diseased, there are many gardening tips available as to how to deal with these. An easy gardening tip is simply to prune away the affected areas.

Be careful not to leave any diseased leaves on the ground, and don’t put the diseased leaves and stems into compost, as compost does not always reach the temperature need to kill the fungi, and when the compost is used, the fungi will spread to the roses again. To help prevent reoccurrence of the disease, or an occurrence of any other disease, keep the rose beds clean. Clear away fallen leaves and pull any weeds.

These common rose diseases should not be too much of a gardening problem for any rose gardener, as, with early detection, they can easily be destroyed without the death of the entire rose bush and garden.

Sunday, April 13, 2008

10 Most Easy-to-Grow Vegetables

You hear a lot of talk these days about how good vegetables are for you. The daily allowance is of five portions of fruit and veg today. But it costs a lot to buy fruit and veg at the supermarket. Despite all the guff about supermarkets being low cost places they still charge a lot for vegetables. It is not uncommon for a couple of lettuces to set you back over $1. You can get veg much cheaper if you go down to the market, but it can be out very cost effective to grow your own.
The following is a top 10 list of easy-to-grow vegetables and their recommended varieties.
1. Carrot. Plant seeds several times throughout the growing season, early spring into fall for a continuous harvest. Soil should be loose and deep. Varieties: ‘Nantes,’ ‘Chantenay,’ ‘Touchon,’ ‘Short n’ Sweet’.

2. Cucumber. Wait until warm weather to plant seeds. Varieties: ‘Sweet Success,’ ‘Fanfare,’ ‘Lemon’.

3. Green Beans. Plant seeds after frost danger. Bush types are easier to manage, but pole types are more productive in an equal space (because they’re taller). Varieties: ‘Blue Lake,’ ‘Contender,’, ‘Kentucky Wonder’.

4. Lettuce. Plant seeds as soon as soil can be worked -- hot weather ruins the plants. Varieties: ‘Black Seeded Simpson,’ ‘Buttercrunch,’ ‘Deer Tongue,’ ‘Nevada’.

5 Onion. Timing the planting of seeds or the miniature onion bulbs called sets can be tricky. Also consider mail-order onion seedlings. Check locally for availability.

6. Peas. Sow seeds early in spring as soon as you can work the soil. Varieties: ‘Alderman,’ ‘Sugar Snap,’ ‘Oregon Trail,’ ‘Super Sugar Mel’.

7. Radish. Sow seeds during the short, cool days of spring and fall. During these times, radishes are perhaps the easiest and fastest vegetable to grow. Varieties: ‘Cherry Belle’, ‘White Icicle,’ ‘Scarlet Globe’.

8. Summer Squash. Sow seeds after weather warms up. Grow bush types to save space. Varieties: ‘Sunburst,’ ‘Yellow Crookneck,’ ‘Scallopini’.

9. Sweet Pepper. Plant seedlings in warm weather along with tomatoes. Varieties: ‘Bell Boy,’ ‘California Wonder,’ ‘Sweet Banana,’ ‘Gypsy’.

10. Tomato. Set out seedlings after the air and soil have warmed up. Tomatoes come in countless varieties; among the best: ‘Celebrity,’ ‘Big Rainbow,’ ‘Brandywine,’ and ‘Enchantment’.

Tomatoes are one of those rare plants that actually benefit if seedlings are planted deeper than they grew in the nursery pot. Plants will be more anchored and sturdier, and roots will develop along the buried portion of the stem. Pinch off lower leaves once you plant.

Wednesday, March 19, 2008

Birthday Flower

Most people have heard of Birthstones, well the following list is of Birth flowers.

JANUARY
Flower: Carnation, Snowdrop


FEBRUARY
Flower: Primrose, Violet

MARCH
Flower: Jonquil, Violet

APRIL
Flower: Daisy, Sweet Pea

MAY
Flower: Hawthorn, Lily of the Valley

JUNE
Flower: Honeysuckle, Rose

JULY
Flower: Larkspur, Water Lily

AUGUST
Flower: Gladiolus, Poppy

SEPTEMBER
Flower: Aster, Morning Glory

OCTOBER
Flower: Calendula, Cosmos

NOVEMBER
Flower: Chrysanthemum

DECEMBER
Flower: Holly, Narcissus, Poinsettia

Friday, February 15, 2008

Disease of Cactus and Succulent

Rotting

The main diseases of cacti and succulent plants are due to various fungal and bacterial rots.

In general healthy, growing plants are quite able to resist infections with these. However they commonly occur as a secondary effect of other problems such as attack by insects pests, physical damage leaving exposed plant tissue or incorrect growing conditions. The single biggest cause is probably fungal rots entering via dead roots caused by poor root aeration.

The best way of avoiding these problems is to provide conditions which prevent their development, i.e., a healthy pest free environment. If they occur and are spotted early it may be possible to save the plant by cutting away all the diseased tissue with a clean knife.

In particular look for discoloured vascular tissue which may be red or brown and penetrate some way into otherwise healthy tissue. The knife should be cleaned with alcohol to prevent spreading fungal spores. It may be beneficial to dust the cut surfaces with flowers of sulphur.

Fungicidal chemicals can be used to give some protection but this should only be tried as a last result since they are not effective against the whole range of different rot producing fungi. Young cactus and succulent seedlings are particularly prone to 'damping off' which is a fungal attack. This can be partially controlled by copper fungicides. The other frequently mentioned chemical for this purpose, "chinosol", is suspected of causing some damage to the seedlings and is not recommended.

Deficiency diseases

The other group of diseases affecting succulent plants are caused by soil deficiencies of various minerals. This may not simply be that the soil does not contain the required elements but that they are not available due to the soil become too alkaline from build-up of salts from minerals contained in the water which is used for the plants. It is useful to know how alkaline your local water is, and if necessary take steps to correct this by adding suitable acid.

Unless you are a chemist and have the necessary knowledge it is inadvisable to use strong mineral acids for this purpose. It is possible to use citric acid or acetic acid (vinegar) but the favourite remedy is potassium dihydrogen phosphate which also supplies useful elements. If your local rainwater is sufficiently clean then this is the best way to avoid this problem.

It is more likely that deficiency diseases will shown up in peat based rather than soil based composts. If a plants looks chlorotic or refuses to grow properly it is worth trying fresh compost to see if this solves the problem. If locally available soils are know to have particular deficiency problems it may be worth adding appropriate supplements.

source: www.cactus-mall.com

Monday, December 17, 2007

Gymnocalycium Cacti

Gymnocalycium cacti are native to the Brazil, Paraguay, Bolivia and a few other South American countries where they grow in quite arid areas. These cactus have cylindrical stems which rarely get taller than around 8 inches with a diameter of 5 inches. All of the Gymnocalycium cactus have fairly large and showy flowers which are are white, yellow, orange and pink. The flowers are borne at the growing point of the cactus on short stems.

Temperature

From September though May you will need to keep these desert cactus in a warm and sunny position avoiding only strong direct sunlight. From May onwards they benefit from being kept out of doors in a sheltered position where they will get full sun, some species will require light shade.

Pot Type

Gymnocalycium cactus are best grown in a terracotta type pot which should have at least one drainage hole in the base and it should be unglazed. This type of pot allows good drainage and allows the compost (therefor roots) to breath.

Watering

These plants should be kept moist at all times during the growing season which is April/May through September, water these plants every few days or every day in hot weather.

Lighting

Grow Gymnocalycium cacti in full sun during the summer and winter, if kept too dark they may become overly lush and could be prone to rotting due to over watering, they will also be shy to produce flowers. Some of the species such as G. calochlorum, G. mihanovichii & G. oenanthemum will need some form of shading during the hottest hours of the summer.

Feeding

If the compost is fresh then feeding may not be necessary at all, if the plant hasn't been repotted recently then half strength general purpose fertilizer can be used at watering time from May onwards once a month. Do not feed the plants from September onwards as this can cause lush growth which can be fatal during the darker cold months.

Repotting

Repotting should be done every other year or every three years, annual potting is not necessary. Remove the plant from its put by wrapping newspaper around the stem if it is very spiny. Carefully tap it out of the pot and remove the old compost to examine the roots, if any are damaged or showing signs of rotting they should be removed as close to the plant as possible.Re plant the cactus using the same mix of compost as it was originally in (fresh) and use a pot just slightly wider then the width of the cactus. Do not be tempted to over pot as this will cause the unused compost to go stagnant and you may loose the plant.

From www.easycactus.co.uk

Sunday, November 11, 2007

The Sun Burned Cacti

Sun light is one of the most important factors for Cactus to grow up. I have found the interesting article about the sun burned cacti. The author is Andy Cook. He lives in California and plants cacti as his hobby for many years. Wish you enjoy and get some advises from the article.

The problem many of us have is that we collect cacti that are genetically designed the live in these varied climates with a wide range of light, water, and temperature needs and expect them to live and thrive in locales that are not always ideal.

The ideal environment for a cactus is not of course solely dependant on its genetic predispositions. There are several factors that contribute to how well or not well a particular cactus will do under certain conditions. The first factor is how it was raised before you acquired it. Most of the cacti we purchase where probably grown in a greenhouse where conditions are more or less kept within a particular range of light, heat, moisture. Seedlings are kept cooler and in higher humidity conditions with a more limited amount of light than your standard commercial greenhouse. As the plants grow larger they will be moved into a greenhouse where they receive light through opaque plastic and depending on the location of the nursery probably a much hotter and drier climate.

So now you've bought your new little pride and joy from your local nursery, cactus farm, or for some of you mail order nursery. You take it home and immediately place it outside in the hot July sun; probably not a good idea. I have made this mistake a number of times now. On occasion I have traveled to Tucson and purchased cacti at any of the number of world class nurseries in the area. I brought them home to Southern California and put them out on my shelf or deck in direct sunlight. My thinking was originally that these plants were raised in the hot and dry desert of Tucson and should do just fine outside in a slightly cooler climate outside. How wrong I was on a number of occasions. The problem was that even though these plants had been living a greenhouse that in the middle of summer probably reached 115 degrees Fahrenheit they still did not receive any direct sunlight through the opaque plastic of the greenhouse walls. My newly found selections were burning up in the direct sun at home when it was only 90 degrees. Their skins where burning and turning white and soft. They were literally cooking in the direct sunlight. To the lack of shade their chlorophyll was breaking down under the intense sunlight. (Ex. 1, Ex. 2)

I have also had the same experience with cacti that were raised outdoors or in a greenhouse, but lived for a year or more indoors on a windowsill in an air conditioned room. In that year of climate controlled bliss they quickly lost their ability to deal with the stresses of heat and direct sunlight and they too seemed to become susceptible to sun burn when placed outside.

Some cacti have different ways to deal with strong sunlight and heat. For example I have noticed that the Ferocacti of the Southwestern Deserts of the United States develop much more abundant radial spines than the same types of cacti raised in a covered greenhouse. The also will usually have developed better protection and a general hardiness on the south facing side of the plant. Another example of protection from sun would be a cactus increasing the amount of fur it produces. (Ex. 3) Some cacti have fur and or an excess of spines in the area where sensitive new growth occurs which helps shield the tender new growth form the effects of the sun. (Ex. 4) Another style of sun and heat protection would be that of a cactus retreating into the ground to get away from the sun.

A classic example of this would be the Ariocarpus Fissuratus of the Big Bend area in Texas and Mexico whose appearance looks remarkably different in the wild than those grown in a greenhouse. Example 5 shows an Ariocarpus in habitat, example 6 is an Ariocarpus raised in much more favorable conditions. (Ex. 5*, Ex. 6*) Personally I have seen these changes in two particular cacti that I have in my collection. First one is a Mammillaria plumosa that looked fluffier and fuller when I brought it home. (Ex. 7) Then after being placed in the direct sun for several months it became much more withdrawn and the tubercles seems to tighten in on the body making it very hard to see any of the green of the body. (Ex. 8) The second example is a Mammillaria haageana that looked quite normal and vibrant when I bought it. (Ex. 9) After more than a year in the sun it shrank down in size and developed a much denser amount of spines. (Ex. 10)

So the problem is not that some cacti do not have defensive features for extreme heat and sunlight it is that the slow growing nature of cacti makes them susceptible to being placed suddenly in unfamiliar conditions. Your average house plant or tree is able to produce more shade leaves when there is an increase in sun intensity or in if placed in an area with a lack of sunlight shed excess leaves rather easily. A cactus on the other hand is just not able to produce more spines, fur, or toughen its epidermis fast enough to deal with a sudden changes in climate.

In conclusion my advice is to know and pay attention to the conditions your cacti have been in and are in. If you are bringing your cacti out from inside after the winter care should be taken to introduce them to the direct sun gradually. The easiest thing to do would be to use a shade cloth, though I feel in most climates this isn't necessary early on in the spring. It would be better to physically move your plants around alternating them in and out of sun from day to day. For some of us this may be easier than others. In my case I have most all of my cacti on a large shelving unit. (Ex. 11) Certain parts of the shelf receive more or less sun during particular times of day. So what I am able to do is alternately move them around on the shelves depending on what I feel their light requirements are. Also in the middle of summer when the sun is at its most intense I almost always at least in part cover my plants with shade cloth. Cacti aren't able to move or put on sun screen so they may need our help when dealing with the elements. So don't let the sun be an enemy of your cacti.

From http://cactiguide.com/