Thursday, May 31, 2012

Hydrangeas Planting & Care


Hydrangeas are the fastcinating flower because their flower color is so wonderful. That can make your garden more gorogeous. Besides you can change if you know how to do it.

Hydrangeas have 5 common varieites:

1. Hydrangea arborescens 'Grandiflora' -- Hills-of-Snow Hydrangea

Prune hills-of-snow hydrangea to the ground line each winter or early spring because it flowers abundantly on new growth, and is frequently killed back during winter. If a larger shrub is desired (3+ feet) and/or it is not killed back over the winter, prune less severely.

2. Hydrangea paniculata 'Grandiflora' -- Pee Gee Hydrangea


This is the most commonly planted hydrangea. They gradually turn to pink and remain on the plant in a semi-dried condition long after the leaves have fallen.

Pruning involves the removal of dead flowers, if unattractive, and an annual corrective pruning of vigorous shoots. Thin and/or cut back the previous season's growth in late winter or early spring, since flower clusters occur on newly developing branches.


3. Hydrangea macrophylla -- Hortensia or Florist Hydrangea

This is a commonly grown hydrangea with large globe-shaped flowers. Once moved outdoors, however, color is dependent upon the pH of the soil in which it is grown: blue if acid; pink if alkaline. There are also several white-flowered cultivars. Prune as soon as the flowers have faded and strong shoots are developing from the lower parts of the stems and crown.

Remove at the base some of the weaker shoots that are both old and new. Always try to keep several stems of old productive wood, with a sufficient number of stout new stems that will flower the following season. Early spring pruning (March), although acceptable, will result in the sacrificing of bloom for that growing season.

Winter protection of the plant should be initiated in December to preserve buds for next year's flowering. Tie the shoots together and wrap with burlap. If left unprotected, delay any spring pruning until the buds swell in order to determine which wood needs to be removed, and then cut back to below the point of injury.

4. Hydrangea quercifolia --Oakleaf Hydrangea

This plant is grown primarily for its handsome oak leaf-shaped foliage, excellent fall color, attractive flowers and interesting winter bark. It is ideally suited to a lightly shaded or protected location. Prune back in early spring to remove dead wood. Cut back to below the point of injury and remove old wood to the base.


5. Hydrangea anomala petiolaris -- Climbing Hydrangea

Climbing hydrangea is a desirable mid-summer flowering woody vine that attaches itself by aerial roots to brick, masonry or wood. It requires little or no pruning. If certain shoots have grown out of bounds, reduce their length in summer.

Hydrangea color

The other big question with feeding hydrangeas is flower color. Acid soils give us blues and baser soils cause pink flowers. The key is aluminum ions in the soil, so aluminum sulfate is a good quick fix, but prolonged use year after year may cause a fatal build up in the soil. Iron sulfate is a safer fix, or try alternating. If pink is what you want, top dress with dolomite or drench with a quick lime solution.

Lighting

Hydrangeas needs the full sun. The ideal place for Hydranges to bloom well is the place which the full sun in morning and the sun shade in afternoon.

Fertilizing

Fertilize hydrangeas in early spring with a complete granular fertilizer at the rate of 2 pounds per one hundred square feet. Apply fertilizer as broadcast top dressing. During long periods of drought, water thoroughly each week.

Soil

Plant in well-drained soil! If soil is heavy, add roughage such as pine bark mulch (Make sure it's ground BARK not ground WOOD .

Watering

Water regularly; do not overwater. Hydrangeas requires consistently moist soil; do not let dry out between waterings

Wednesday, May 23, 2012

Making organic compost from food scraps

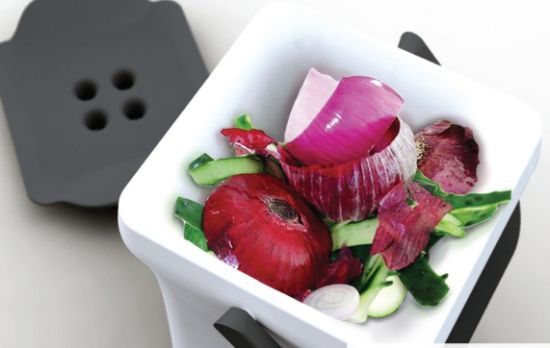
If you think food scraps in your kitchen such as coffee grounds, tea bags, stale bread, grains are useless, you're wrong. You can make organic compost by yourself from those scraps easily.
Composting from food scraps not only help the earth to trap you can also provide additional nutrients to the soil without paying any penny.

Here is the list of food waste can compost

  • All your vegetable and fruit wastes, (including rinds and cores) even if they are moldy and ugly
  • Old bread, donuts, cookies, crackers, pizza crust, noodles: anything made out of flour!
  • Grains (cooked or uncooked): rice, barley, you name it
  • Coffee grounds, tea bags, filters
  • Fruit or vegetable pulp from juicing
  • Old spices
  • Outdated boxed foods from the pantry
  • Egg shells (crush well)
  • compost from food scraps
  • Corn cobs and husks (cobs breakdown very slowly)
Food waste cannot compost

  • Meat or meat waste, such as bones, fat, gristle, skin, etc.
  • Fish or fish waste
  • Dairy products, such as cheese, butter, cottage cheese, yogurt, cream cheese, sour cream, etc.
  • Grease and oils of any kind
  • Kitty litter or animal feces
  • Those will make the compost smell badly and attract maggot or rodent.

How to do compost from food scraps
1. Select a dry, shady spot near a water source for your compost pile or bin.
2. Before you add scraps, make sure larger pieces are chopped or shredded. The smaller pieces are, the sooner the compost will be ready.
3. Cover your composting area with a 6-inch layer of brown materials (dead leaves, branches, chip & twigs, shredded newspaper, saw dust)
4. Add a 3-inch layer of green materials (grass clippings, food scraps)and a little soil or finished compost.


5. Lightly mix the two layers above.
6. Top with a 3-inch layer of brown materials, adding water until moist.
7. Turn your compost pile every week or two with a pitchfork to distribute air and moisture. Move the dry materials from the edges into the middle of the pile. Continue this practice until the pile does not reheat much after turning.
8. Your compost will be ready in 30 dayss, but let the pile sit for two weeks before using.


Wednesday, May 16, 2012

Cochineal vs Cactus


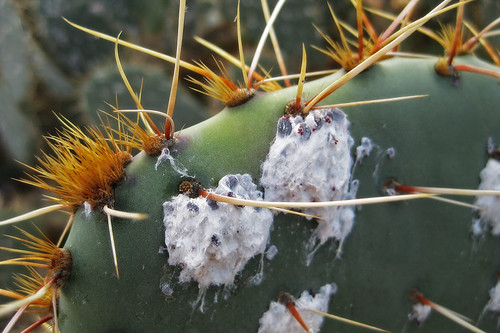
When you look at the white spot covering on Opuntia, do you think it's from fungus or insect?  The answer is from an insect infestation. The white sticky mounds are the housing for cochineal bugs (also known as mealy bugs.  


 The white sticky mounds are the housing for cochineal bugs (also known as mealy bugs)  All of the host plants of cochineal colonies were Opuntia species. Cochineal feed on plant moisture and nutrients.


Like the aphid (a related insect) the female drives her tubular proboscis through the cactus skin, where she will remain affixed for the rest of her life, sucking out the juice.  Simultaneously, she produces a white, waxy, fungus-looking coating that will help protect her from predatory insects and birds and shade her from the desert sun.  However, she sometimes fall prey to a rare carnivorous caterpillar and more commonly, to our good friend, the ladybird beetle.  Over time, a heavy cochineal infestation can kill its resident plant. 


However, Cochineal has industrially important insects because Cochineal can produce scarlet, orange, and other red tints. The  colors are produced from carminic acid which is today primarily used as a natural dyeing for food, pharmaceutical and cosmetics industries .  And seriously, there are cochineal farms for export in some countries such as Peru, Australia, Mexico, Chile.

If you don't want cochineal on your healthy plants, it’s suggested to treat  the damaged areas by scrubbing them with insecticidal soap or unscented dish soap. In small areas you can scrub with a tooth brush but for larger areas it is best to use a long handled brush. Or you can just spray all of the surfaces of the prickly pear pads thoroughly using a power nozzle attached to your hose and then thoroughly spray with a solution of spectraside and insecticidal soap. Do not rinse after applying the spectraside and insecticidal soap.


source: http://www.desertusa.com, http://www.thecactusdoctor.com, http://en.wikipedia.org

Monday, January 2, 2012

Aphid at Cactus root

On New Year holidays, I had free time to notice that my poor astro. baby cactus became flatter and smaller.  When I removed them out of the pot, I got the answer: aphid stayed at the root.  This awful insect suck the juices of root for food.  I think it was because I rarely sprayed the chemical insecticide.  I usually use the organic one which may not be strong enough.
You can see the small white thing in the soil.  This is evil aphid.

After realizing the problem, I also washed and cleansed the cactus root in water.  I tried to remove all soil and dust from the root softly.  If do severely, the root might be damaged and the recovery will take longer time.
Here is the cactus after I scrubbed all soil.  It becomes bare root now.


I'll leave them like this for several days and plant in the pot later.  Hope you guys will have time to care your cactus, not ignoring them like I did.  

Sunday, December 25, 2011

ฺPlant bare root cactus

If you buy the plant from online shops or nurseries, the sellers always pack and ship it with bare root or unpotted.  Some people don’t like this way because the plant will be dormant and also need time to recover in the first 2-3 months.  However, shipping with bare root has some advantages: less damage to the plant during transportation, especially big one.  The shipment is cleaner: no soil, small rock or bug.  You will be charged with lower freight due to less weight from soil and pot.  Meanwhile, with new root, the cactus will grow faster and healthier after 6 months that you got it.  


Here is the instruction what to do when you get bare root cactus & succulent.

  • Upon receiving your plants, open boxes as soon as possible. If any damaged roots are observed, trim with clean scissors before planting. Keep the new plants somewhat dry until new roots start forming. This can take a few days if hot or weeks or longer if dormant. During the shipping process, some plants may become de-acclimated from their normal full sun environment, and could burn if they are exposed too soon to extremely hot sun.

  • Before planting, allow it to dry 10 to 25 days after you receive your cutting. (Thick cuts and cool weather require a longer drying period). To dry the wounds, leave the cutting in a shady, warm exposure, not direct sun.

  • Plant it in DRY cactus potting soil and pot about an inch wider than the diameter of your cactus.

  • Do not water for another 10 - 25 days. After the cutting develops a root system it is safe to start a light regular watering cycle. Always let the soil dry out completely between applications of water. It is more likely that a cutting will be killed by over watering than under watering.

The bare root shipping is applied not only to cactus & succulent but also to other plants such as rose, orchid, nepenthe and etc.  But the ways how to deal with each one after receiving it are different.  So study the plant’s habit and ask for advice from your seller.  

Source: www.cactusstore.com


Wednesday, November 2, 2011

Watering while you're away or on vacation (2)

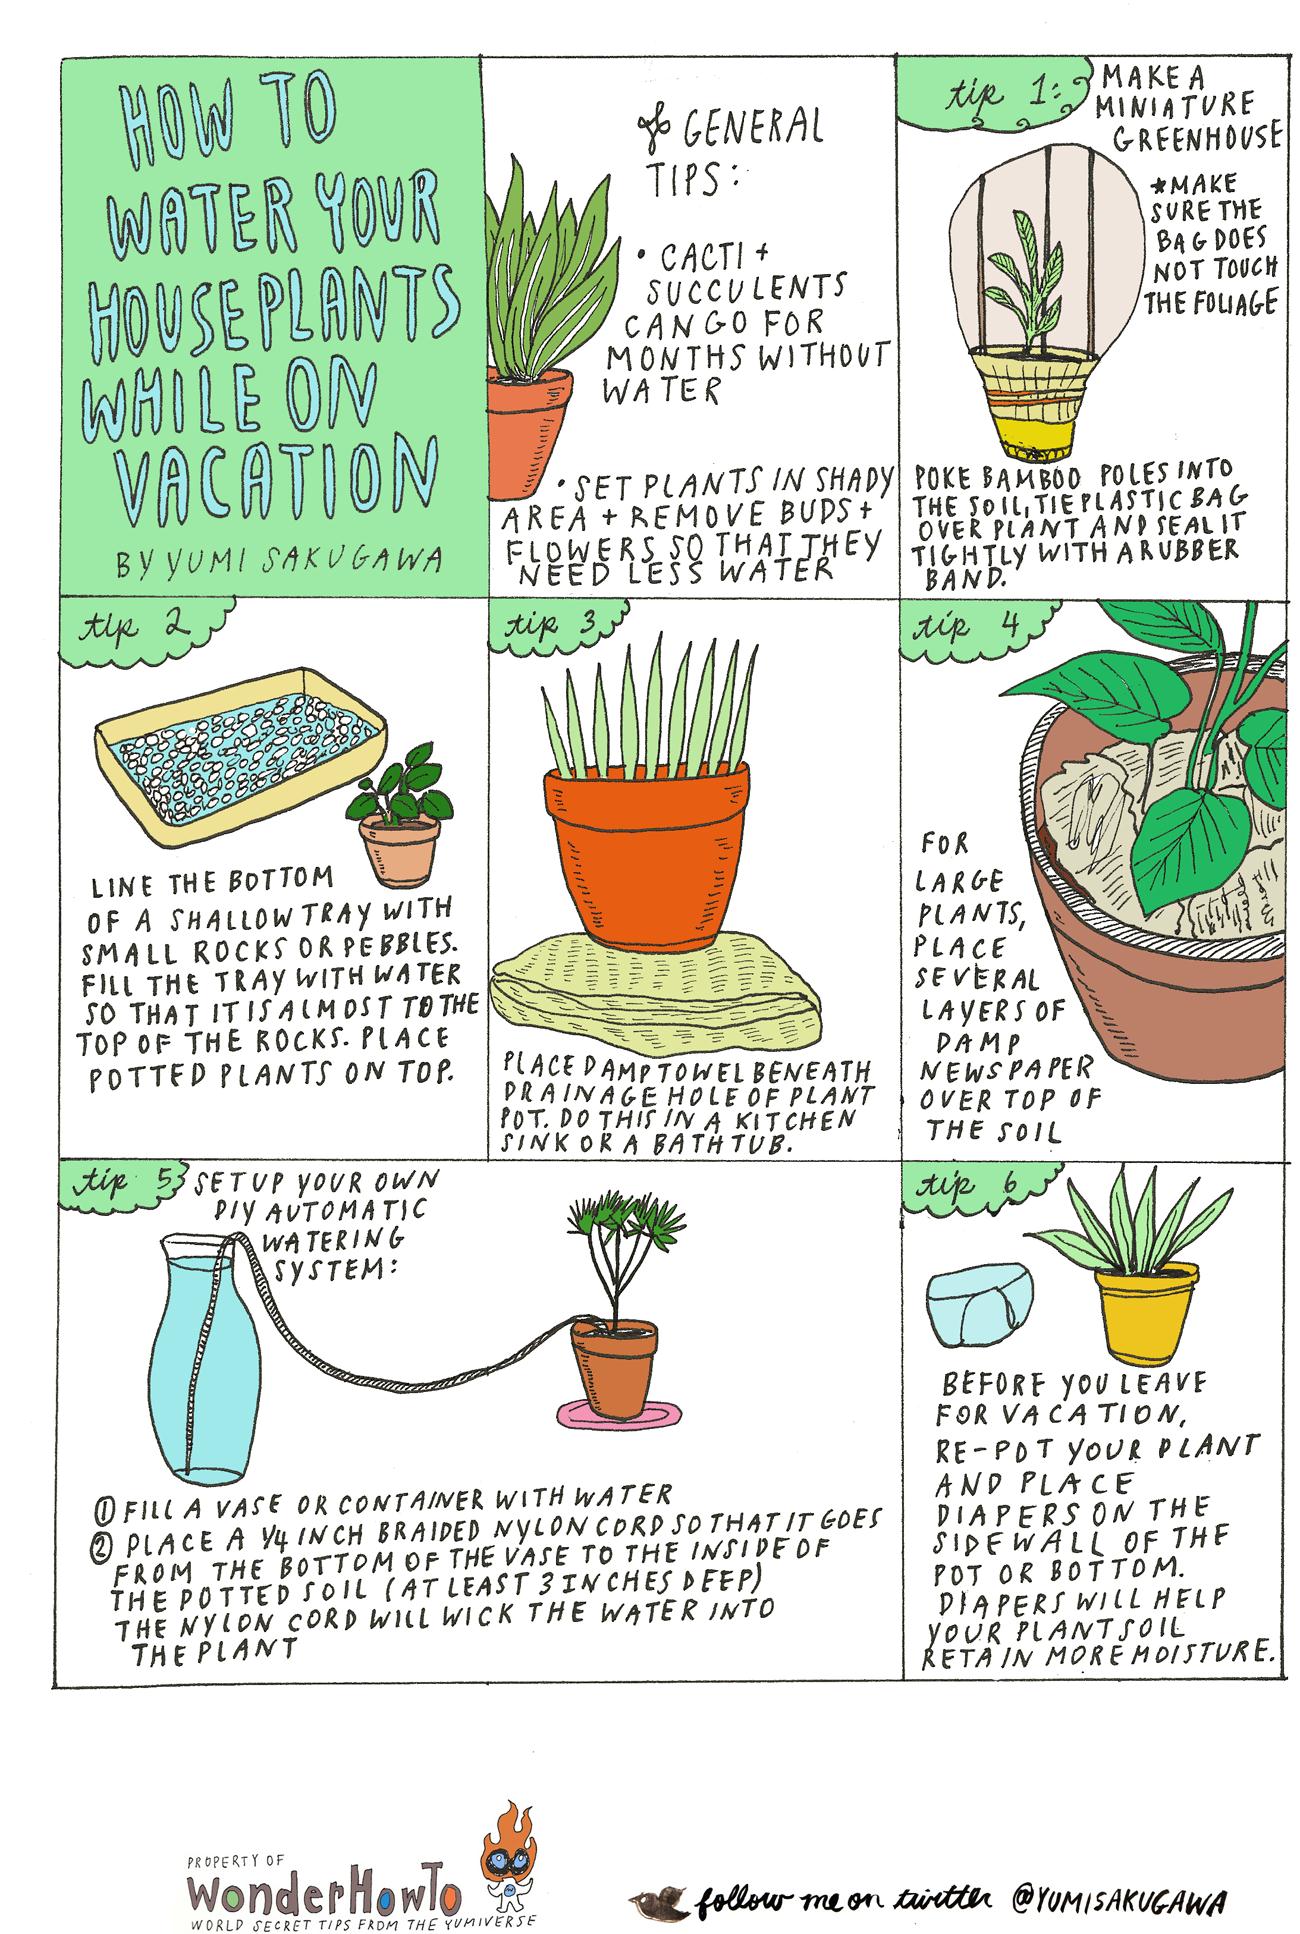
Here are another easy DIY tips which explain by simple picture.  


source: http://thesecretyumiverse.wonderhowto.com/blog/6-diy-tips-for-watering-your-houseplants-while-away-vacation-0130874/

Watering while away or on vacation (1)


Watering plants is the daily important task for gardeners but who will do it while you’re away or on vacation??? Here are some helpful ways to solve the problem: 

- Ideal way is to have a friend, neighbor, or family member come to the house and water. There are some drawbacks to this idea and you must weigh them carefully before entrusting this chore to someone else.

- Enclose plants in large transparent or clear plastic bags. Place the plant inside the bag and then close the top tightly with lightweight twine or ribbon. If the top flops and bends the plant, put a tall stick in the pot to hold up the bag. This way will work for 2 weeks vacation.    
 It's important not to water just before enclosing the plant. If you do, so much water will condense inside the bag that the plant surface becomes too moist. 

- The simplest method for outdoor pots and hanging baskets is to move all of them into your dark, cool garage, bathroom or place. (Do this BEFORE watering them; they’ll be lighter and easier to move.) The temperature and will remain constant and evaporation will slow. Always use drip pans under the containers to retain water. For ten days, they should be fine.

fill a washtub with gravel, fill the tub with water just to the level of the gravel, and set a plant on top of the gravel. The humidity from the water will prevent it from drying out. Another method is to set bricks in a bathtub, fill the tub with water to the level of the bricks, and set plants on the bricks.

- Move all your containers to a shady, protected area. Place drip pans under each and water well. Group together those that need less water and place in the most protected spot; then group the thirsty ones together and place them close to the others. Unless a heat wave comes while you’re gone, they should all be fine. If you will be away longer, then ask a trusted individual to come in and give any dry pots a drink.

Double potting smaller containers also helps insulate the soil during the hottest weather. Place the container inside a larger one, then fill the space with soil or fine mulch. (This is beneficial whether you're away or at home.)

- Adding a layer of mulch to the surface of each pot helps cut down on evaporation.

- Make your own self-waterer:
1.      Cut the bottom out of a plastic beverage container.
2.      Remove lid and cover the opening with a small piece of gauze, secured with a rubber band around the neck of the bottle. (This keeps the soil from forming a plug in the opening.)
3.      Push neck of bottle into the soil; do this near the edge so the bottle can rest against the pot.
4.      Fill the bottle with water the day before you leave; then on the day you leave, top up with water again.

- Use water Delivery Devices or Gels, or time-release water products.  Several products are available which utilize all-natural, biodegradable ingredients to keep soil moist. The gel-form water gradually releases the moisture when it comes into contact with the soil.